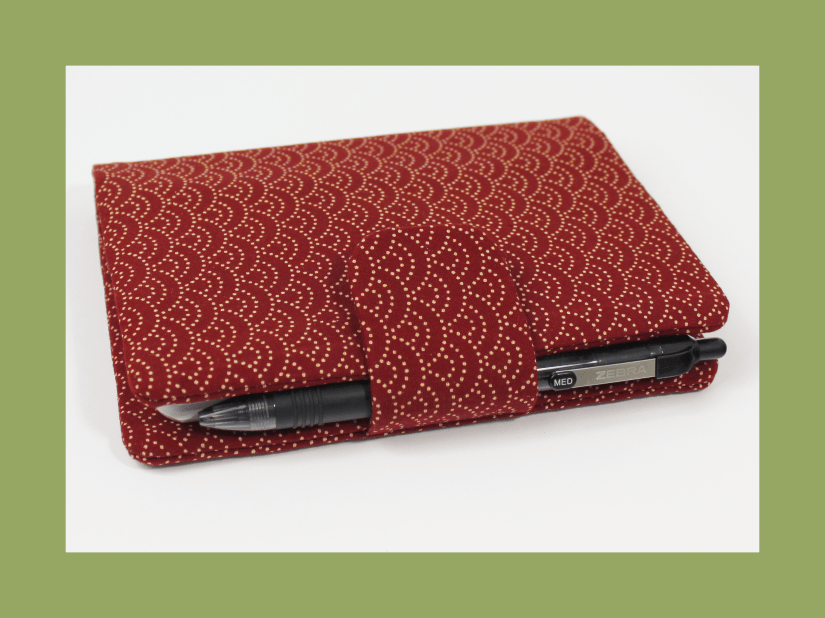
I’ve been working on a new product for my Etsy store – an A6 notebook cover. So, I thought it would be helpful to share my step-by-step process of adding a new item to my shop in this week’s blog post.
This is going to be rather long, so I’ve added some links to take you directly to different sections of the blog (oooh I’m getting fancy)
Designing
Photos
Listing Details
Title
Tags
eRank
Publishing
Designing and Sewing
Even though there are sewing patterns available for notebook covers, I wanted to design my own. By coming up with my own construction method, I find I can work more efficiently, only needing to refer to my notes when cutting out each piece to remind myself of the measurements.
I measured an open A6 notebook and added 1/4″ for a seam allowance to all edges, to get a rough guide on how big to cut out my pieces. First I created a simple cover without any interfacing. After testing, I only needed to make minor adjustments. The cover is lightweight and soft, but I wanted it to have some structure, so needed to decide what combination of interfacing to use and where.
Once I was happy with all my test versions, it was time to pick out which fabrics to use. Some are easy to work with, but with some patterned fabric, you have to think about the layout. To help I made myself a template, simply using a piece of card, cutting it to the size I needed for the main outer body of the cover, and then cutting out the centre so that when placing it on my fabric it would show what would be seen once it had been assembled. I then made use of my 3D printer to make a template for the tab, again with the area cut out so I could see what would be on show when the tab had been sewn together, both on the front and the back. This was especially useful when using fabric with a directional print, and as it’s 3D printed, I can cut around it using a rotary cutter.
Getting it Ready to Sell
Photo’s
Once I’d made up a few covers, it was time to about how to show them off.
Deciding on the best way to present my items is probably what takes me the longest when putting together a listing.
I’ve talked in previous blogs about various props, especially to help someone gauge the size of something rather than just give them the measurements. As my cover is designed to fit an A6 notebook, and one is included, I’m just going to use some rulers in one of my photos as a guide, and of course state the exact measurements (in inches and centimetres) in the description and Info card I include in one of the photo slots. I used to put this near the end with the other info cards I have about postage and delivery but decided to put it 3rd this time.
Once I’ve decided on the 6 or 7 different views I then look to replicate the photos with the other covers I’ve made, so my pictures will be consistent for each listing.
As my photography skills are improving, I find that most of my pictures are now needing minimal editing. Cropping and a slight adjustment to the white balance is generally all that’s needed, even a small white balance adjustment of 2% can make a big difference to the final result. Occasionally, I’ll upload my photos to Etsy and realise that a picture does need another tweak, it helps when you see them all together. It’s easy to make adjustments and re-upload the photo before publishing. I like to add a simple frame around my photos, as a few of my items could come up in the same search results the border shows that they are from the same store. So may prompt the potential buyer to think “oh they have a few, lets go take a look”
I use Affinity Photo to do my editing – I’ll look to do a blog about the various software I use in a few weeks.
Listing Details
I haven’t completed the photos yet, but I took a break and began working on the main product description. Some people prefer to start with the title of their listing, but I find that completing the description first makes it easier for me to do the title and tags.
With the description, you can have a master for each product and then edit parts that pertain to an individual item. For example, for my notebook covers, I include information about the fabric colours and pattern, as well as thinking of a possible target audience and some ideas about who it can be used.
Recently, a lot of people have been using AI tools like ChatGPT to create product descriptions. However, after reading some of the results it has generated for others, I don’t think it’s the right fit for me and my shop. I prefer to write my own descriptions since it’s my product and my design, and I want to use my own words to convey its features to potential customers.
Ok, I do use Grammarly to finetune things, but that’s because I know I overuse certain words; in this blog post alone I have removed the word “just” numerous times.
Additionally, proofreading your own work can be challenging because your brain may read what you expect to see, rather than what is there. Therefore, I find it helpful to use Grammarly to catch any mistakes I may have missed.
I am not an expert on creating Etsy listings, but I can share my current process with you. It’s important to give the Etsy algorithm enough time to work its magic. However, if I notice that my listings are not receiving views or sales after a couple of months, I can look at making some changes.
Title – This is one of the areas that Etsy’s algorithm uses when someone does a search on the site.
I’ve seen many “Etsy Experts,” say to stuff your title with as many words as you can, to use all the 140 characters available.
I have done this with older listings, but your title is generally the 1st thing a potential customer will read, so it has to make sense to them, therefore now I like to keep it clean, and simply say what it is.
For example, A6 Soft Notebook Cover, Baking/Cooking Theme, Cotton Fabric – Lined Note Book Included
You want your most important words to be at the start of the title, as this, along with your main photo, could be what makes a potential buyer click on your item out of the sea of results, to find out more about it. I have used the word Notebook twice, but the 2nd time I’ve written it as Note Book as I kept finding myself typing it like that so it may be how others will too.
Tags – Here you can add keywords/short phrases that are relevant to your item, they are not seen against your listing, but again, used for the search algorithm.
You can use up to 20 characters for each of the 13 tags available. I do repeat some details that are in my titles, like A6 Notebook Cover, and Cotton Fabric but then I also think about how it can be used or why someone may be buying it, Small Journal, Gift for Baker, Recipe Ideas. I can take inspiration from the description I’ve written.
eRank
When I’ve done my Title and Tags, I’ll save the draft and then pop over to eRank. My store is linked to eRank and it can do a Listing Audit and give it a grade dependent on how well it believes my listing is following Etsy’s best practices. It can look at the tags I’ve used and tell me how popular they are and when. ie Gift for Baker was searched for most in November last year, so it was probably people looking for Christmas gifts.
I’ve only skimmed the surface of what eRank can do, and need to find the time to really delve into it
Publishing
I do then like to take a step back and not move listings from Draft to Published straight away. Often I can think of something else I want to add, and ideally, I don’t want to mess around with it too much after it is published. For example, for this listing, I forgot to mention that it’s reusable, so I added it to the Title and Listing Description.
The final step before any listing is published is the anxiety – what if they are not good enough and no one wants to buy one, or they buy it and think it’s rubbish and then they give me a bad review, which looks bad and my shops going to fail.
Recently there were a couple of posts in Etsy Facebook groups where we talked about the anxiety we feel. I mentioned in one of them about my blog, and although I know it’s not read by many, that’s fine, because in a way writing my blog is a bit like therapy, and I like to have a record of my journey.
When you hit publish, Etsy will do all the necessary checks to make sure all mandatory sections are completed. I did find for most of mine, I’d not selected that it was handmade by me.
I’d copied one of the listings where I’d missed this, and so it was then missed on all those drafted from the copy
I try and upload once a month at least on a Sunday, and so today I made my listings live.
Some will stagger them uploading one a day or every other day. But I know as a buyer I’d rather see all that a seller has on offer in one go, rather than in dribs and drabs.
Are there some things I still want to tweak, of course, but for now I’m going to leave them be and see how it goes.
